Data Export Setup
Data Export enables you to extract structured data from the i2o platform into your own cloud storage so you can integrate with internal dashboards, automate reporting, and build custom analytics pipelines.
Currently, you can export data from:
- BuyBox
- Brand Protector

Exports are sent to your configured storage on a recurring schedule.
Supported Export Destinations are:
- Amazon S3
- Google Cloud Storage (GCS)
How to Set Up Data Export
This option is available only for organizations subscribed to the Data Export.
Step 1: Select Destination
1. Navigate to the Data Export section from the left-hand menu.
2. Click “Add Destination”.
3. You will see two connectors:
- Amazon S3 (Click here to know AWS in-detail procedure)
- Google Cloud Storage (GCS) (Click here to know GCS in-detail procedure)
4. Select your desired destination and click Next.
Step 2: Configure Destination
1. Fill in the configuration details based on your selected destination.
Starred are the mandatory fields (*)
2. Refer to the table below for the required fields and where to find them or just hover over the field for information.
Field | Amazon S3 | Where to Get (S3) | Google Cloud Storage (GCS) | Where to Get (GCS) |
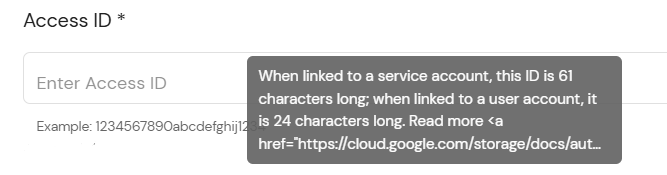
Access Key ID | S3 Access Key ID | AWS IAM Console → Security Credentials | HMAC Key Access ID | GCP Console → Storage → HMAC credentials |
Secret Access Key | S3 Secret Access Key | Shown once during key creation | Secret Access Key | Shown once during HMAC key creation |
Bucket Name | S3 Bucket Name | AWS S3 Console | . GCS Bucket Name | GCP Storage → Bucket Details |
Region | AWS Region (e.g., us-east-1) | In S3 bucket overview | GCS Bucket Region | Bucket details in GCP Console |
Path | Folder path (e.g., growth-exports/) | User-defined | Not applicable | — |
Compression Type | None, GZIP | Based on preference | None, GZIP | Based on preference |
Format Type | CSV, JSON | Based on need | CSV, JSON | Based on need |
Ensure your bucket is created and accessible before proceeding. For GCS, set bucket options as:
- No retention policy
- Protection tools: None
- Object versioning: Disabled
Test the Connection
Once you fill in the details:
1. Click “Test Connection”.
2. The system will attempt to reach and authenticate with your storage (may take 1–2 mins).
3. Only upon success, the Next button is enabled.
Message appears like so:
Step 3: Select Modules
1. Choose the modules to export, you can select one or both.
2. For Brand Protector: Losses, Listings, Resellers, Brand Violations
For BuyBox: All associated data is included
Step 4: Set Sync Schedule
1. Choose how often the data should sync:
- Every 4 hours
- Every 8 hours
- Every 24 hours (recommended for most users)
2. Click "Next".
Step 5: Review Summary
1. Review all your selections:
- Connection status (e.g., “S3 connection verified”)
- Selected modules
- Chosen frequency
2. Click “Start Sync” to create the pipeline and start data export.
3. Sync will begin once the pipeline is created (typically 2–5 mins).
Managing the Export Pipeline
Each organization can have only one active pipeline.
1. From the UI, you can:
- View pipeline details
- Edit name, frequency, and selected modules
- Delete the pipeline
- Enable/Disable the pipeline
- Trigger a manual sync (ad hoc run)
Job History & Monitoring
1. In the Job History section, you can track:
- When the last sync occurred
- Sync duration
- Number of records extracted and loaded
- Sync status (success/failure)
Example: “Synced 5,000 records in 1m 45s on June 27 at 2:30 PM”
Related Articles
How to setup GCS bucket?
Google Cloud Storage (GCS) Setup Guide Follow these steps to configure your GCS bucket and service credentials for use with i2o Data Export. Step 1: Create a GCS Bucket Go to the GCP Console Navigate to Storage → Create Bucket Choose a unique name ...How to setup S3 bucket?
Amazon S3 Setup Follow these steps to create and configure your Amazon S3 bucket for successful integration. Step 1: Sign in to AWS Log into your AWS Console using appropriate credentials. Step 2: Create an S3 Bucket Go to Services → S3 → Create ...How To View Data Health
On the home page of the i2o Product Center, the Data Health dashboard gives you a snapshot of your product catalog's data quality across the i2o Retail platform. It highlights gaps and inconsistencies in your product data so your team can take action ...Content Change Alerts
Overview The Content Change Alerts is a part of the Content Monitor module. This screen monitors and reports changes made to product pages on Amazon, like titles, descriptions, bullet points, images & videos etc. Users can view detailed analytics and ...Buybox
Overview The Buybox Monitor is a key part of the Price Monitor module and provides visibility into buy box status and performance across multiple regions and platforms like Amazon, Walmart etc. It helps you track how often you win or lose the buy ...